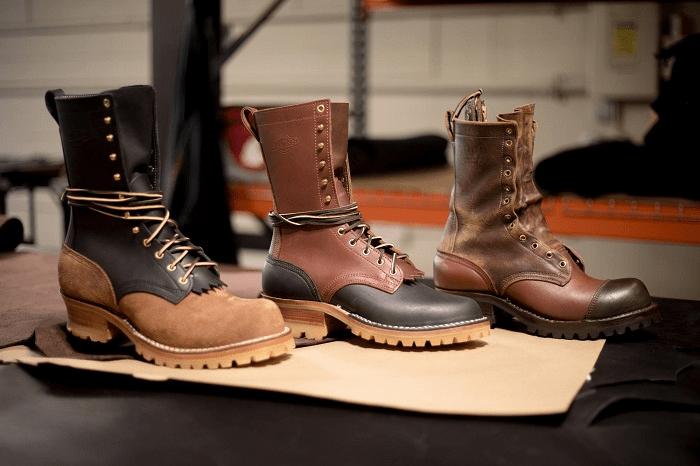
It’s no secret that the Pacific Northwest boot companies have been having their time in the sun. No matter if it’s to wear when you’re actually felling trees, or to wear to your office job because it’s slightly rainy, the “grail” moniker is increasingly being attached to this kind of boot. However, if you’re like a lot of guys, once you decide to buy you might be a little overwhelmed with how to order a Pacific Northwest boot. Unlike most other brands – where you might pick the color, and if you’re lucky the width – with this style you’re going to be faced with nearly countless options.
This article is going to tell you about the ordering process. What the options mean, and what you can expect once you click “buy.”
By the way, for most of the pictures and links, I’m using Nicks Boots, but it will apply to each of the brands mentioned below. If one of the brands does things a bit differently, I’ll make a note of it.
What is a Pacific Northwest Boot

You might think that a Pacific Northwest boot is just a boot that comes from the Pacific Northwest – the U.S. states of Oregon and Washington, and the Canadian province of British Columbia. While technically true, when most people say a Pacific Northwest boot, they mean a particular way of building boots.
Of course, there are always asterisks, but in general a Pacific Northwest boot will have a few key traits beyond just where they are made. First, they are almost certainly going to be made with stitchdown (or stitchdown plus additions) construction. Many of these brands were founded by workers who previously worked at one of the other brands. Construction between them is often extremely similar.
Next, they are going to be overbuilt – thick midsoles, thick outsoles, thick uppers. Even if you’re buying them to run to Target, the appeal of this style of boot is that it could stay together if you’re fighting a fire.
Finally, Pacific Northwest boots are mostly hand made. This doesn’t just mean the sewing of the upper, but the lasting as well. Since there is so much human labor involved, it allows for the high levels of customization that this guide will cover.
Who makes a Pacific Northwest boot? There are new brands popping up (and, unfortunately, folding) all the time. At time of writing the big names are: Nicks Handmade Boots, White’s Boots, and Wesco Boots. Smaller shops include Drew’s Boots (who are owned by Baker’s, a retailer who sells many of these brands), Frank’s Boot’s, and JK Boots.
Who doesn’t make the cut? Ultimately, what is and isn’t is entirely subjective. Most people would say that despite being made in the Pacific Northwest, Viberg, Truman, and Danner don’t fit the bill.
Where to Start When Ordering a Pacific Northwest Boot
For most of these brands, the first place you’ll want to go is their website. Here, you’ll be able to find each of the models that the brand makes. Though I use the term “model” here loosely. The only brand that you’ll be better off somewhere else is White’s. For whatever reason, Baker’s has better options available on their website and better fitting – with a small upcharge.
With a few exceptions (such as Chelsea or Engineer boots), the customization available means that you can turn any model into another. Instead of take-it-or-leave-it, you’re better off thinking of these models as starting points. Find one you like the look of and build or subtract to your desire.
Once you’ve found an overall starting point, it’s time to move onto finding a shape that fits your foot.
How to Order a Pacific Northwest Boot: Fitting
There is no replacement for trying on in person. If you’re lucky enough to live near these bootmakers, just drive in for a fitting. However, for the vast majority of people that simply isn’t going to be possible.
Thankfully, each of these brands offer free fitting advice.
For the most part, the brand will ask you to download and print out a “fit sheet,” and grab a tailor’s tape. Here, you’ll use the paper to get your foot’s length, width, and overall shape. This is similar to most shoe stores, but the tape takes it a step further. After getting the circumference of a few places (typically ball and midfoot), you have a more complete idea of how your foot is actually shaped.
It’s possible to do this yourself, but it really helps if you have someone to help. Your foot changes shape once you stand on it. In other words, it’s easy to get a measurement wrong if you’re not standing up straight. Further, make sure you’re wearing the socks you plan to wear with the boots. “Boot socks” can take up a half size of space compared to thin dress socks.
Depending on the brand, you can either mail in the fit sheet or call in with the measurements. It’s important that you don’t try to scan and email – this will distort the shape. The difference between a size is around 5 mm or 1/8th an inch. Even a small change can impact your result.
Once you’ve connected with the maker, they will recommend not just a size, but can give you advice on the last as well.
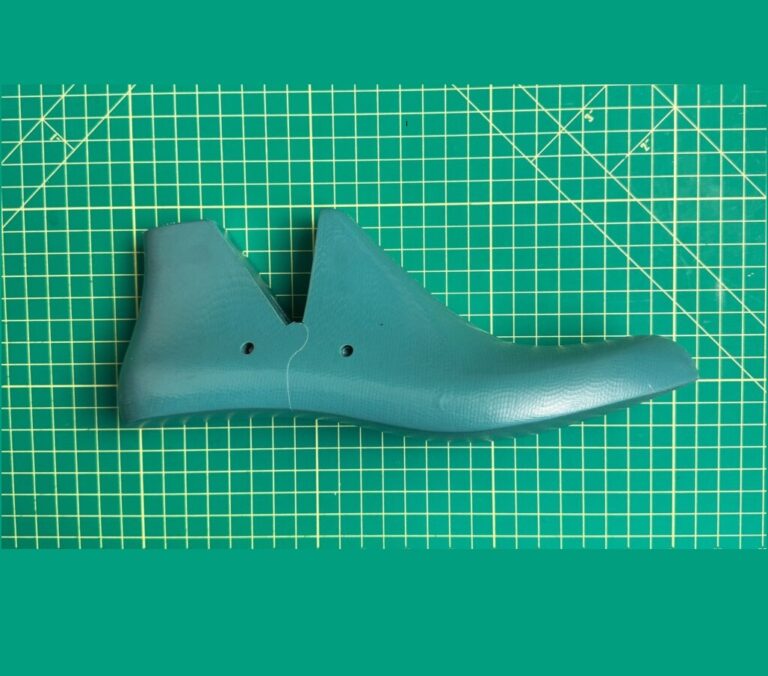
How to Order a Pacific Northwest Boot: Last

One of the first decisions you should make is the last of the boot. The last, or the shape that the boot is built around, impacts just about everything else. Not only is it crucial for comfort, but may limit certain choices down the road. For example, since the steel toes require more space, they might not fit in every last.
The last will also impact the arch support of the boot. Each brand uses different terminology, but most will break their lasts into “high arch” and “moderate arch.” You should know that when they say high arch, they really mean high arch. Think of standing on a ladder with no shoes on for the first few weeks. Even the moderate arch will be higher than just about any other boot you’ve ever owned.

If you’re not sure what last is best, don’t hesitate to reach out to the brand. Unlike other items that are at most annoying if you get them wrong, you will feel the last with every step. Relasting is possible, but is almost as much as the boots cost in the first place, so you’re likely better off selling your pair and buying a new one if you make a mistake here.
How to Order a Pacific Northwest Boot: Leather
The next option you’ll be faced with is leather. When picking, you’ll typically be offered two sets of leathers – often at different price points.
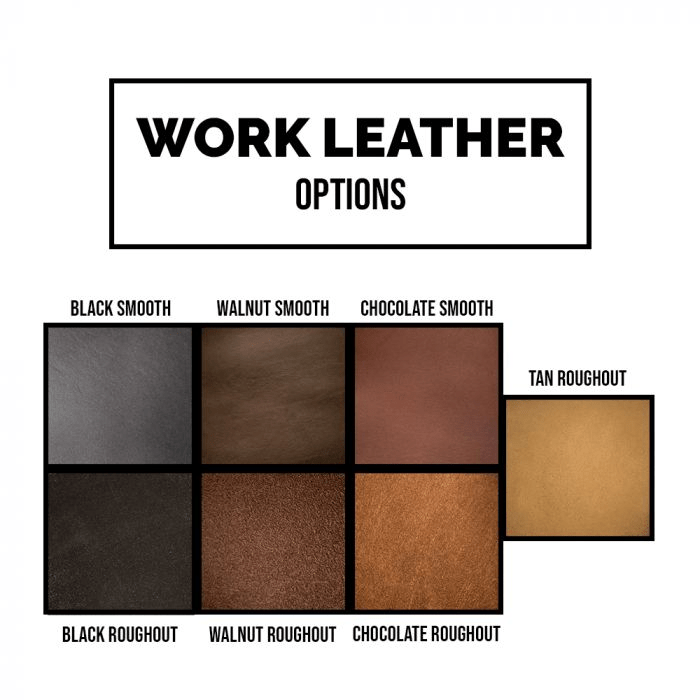
The first is likely to be called something like “work” or “support” leathers. These leathers are going to be among the most durable that the brand sells. At the same time, visually will be nothing to write home about. Choice in color is probably just going to be black, brown, and tan. You can also do flesh in (smooth leather) or flesh out (rough out).

The second is probably labeled as “heritage” leathers. If you pick one of these, you’re trading a bit of durability for something that is more interesting to look at. There really isn’t any limit to what could be included, but a few examples include Horween’s Chromexcel and Waxed Flesh, various vegetable tanned leathers, and more exotic leathers such as bison. You’ll also find much more adventurous colors – burgundys, greens, reds, and more – in these options.
Some brands will offer more specific leathers such as horse hide, or it’s fancy cousin shell cordovan, but expect a serious price increase.
The benefits and drawbacks of each of these leathers is an article for another time, but the key take away here is deciding if having something a bit more durable or a bit more stylish is key for your use.
How to Order a Pacific Northwest Boot: Split Lower / Upper Leather
One additional option you might be offered is the chance to have a different colored leather for the vamp and heel from the shaft. This grew from the desire for boot owners to have rough out – which is more abrasion resistant – near the bottom of the boot and smooth leather where your pant hits.

If you’re looking for that particular combination, this is a great way to do so. However, I would urge caution going for different colors. It’s very easy to think that you’ll definitely rock that burgundy-and-tan combination when you order, but in person it is much, much harder.
All of the large brand’s caution against doing this unless you really need it for work.
How to Order a Pacific Northwest Boot: Height

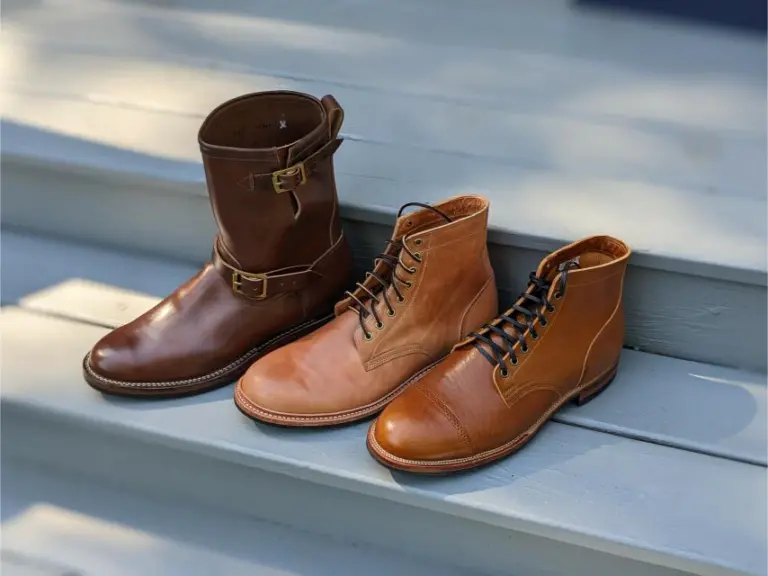
Typically, when ordering a Pacific Northewest Boot, your next decision is going to be the overall height of the boot. If you’re trying to nail down a specific fit, you should know the height measurement is almost always slightly less than what is listed. In other words, if you order an 8-inch boot, expect it to go 7 to 7.5 inches up your leg.
Heights generally start at 6 inches, and can go up as high as 16 inches. The vast majority of boots out there are 6 inches or less. Viberg’s service boot, the Alden Indy, the Allen Edmonds Higgins mill, etc. For most people, when you think of a boot, you’re thinking of a 6-inch boot.

By going larger, you’re going to get additional protection. However, you’re making very real tradeoffs. First, getting them on and off will be much harder. Lacing and unlacing – even with speed hooks – can take a lot of time. They will also be harder to break in, and may even require special extra-tall socks.
Most recommend getting the lowest height that provides the protection you need.
How to Order a Pacific Northwest Boot: Gusseted Tongue

While not typically listed on the website, when ordering a Pacific Northwest Boot, you often have the choice if you want a fully or half gusseted tongue. On a fully gusseted tongue, the tongue leather will be stitched all the way to the top of the boot. While making the boot harder to get on and off – and adding more leather bulk overall – this helps keep dirt and grime out of the boot. It also keeps your tongue from falling to one side as you walk.
A half-gusseted tongue will be cut a few inches from the top of the boot. This style isn’t as water proof, but allows the tongue to be pulled out of the way when putting on or taking off the boot. For some this is a comfort thing, but if you have limited mobility this might be the only way to get a pair on and off. This style also means you won’t need to fold the leather over on itself when tying, getting even more comfort points.
Unless you have a specific reason – be it a need to keep out debris or a mobility issue – what you opt for is generally just personal preference.
How to Order a Pacific Northwest Boot: Standard, Rolled, or Cut Top

When you order a Pacific Northwest Boot, the top of the boot will come in three different designs.
If you order a standard top, the leather is cut and a piece of leather is sewn along the top edge of the inside of the boot. This is by far the most common way of making a pair of boots, and provides extra durability and comfort. You can tell a boot has a standard top when you see two rows of stitching – one along the edge and one about a half inch lower.

A rolled top features a piece of leather rolled over the top of the boot. Rolled offers a look that many would consider to be a bit more polished, but others might see as fussy. You might hear some say this offers better debris protection, or is more delicate, but it’s really just a fashion call.
The last is a cut top. This is where the top of the boot is just raw leather. After asking around, I’ve been told this is for people who want a very soft top to their boot. However, this has a major impact on durability, and I’ve personally never met anyone who has opted for this.
How to Order a Pacific Northwest Boot: Logo

Some brands have a pressed logo in the side of their boots, or even model specific numbers.
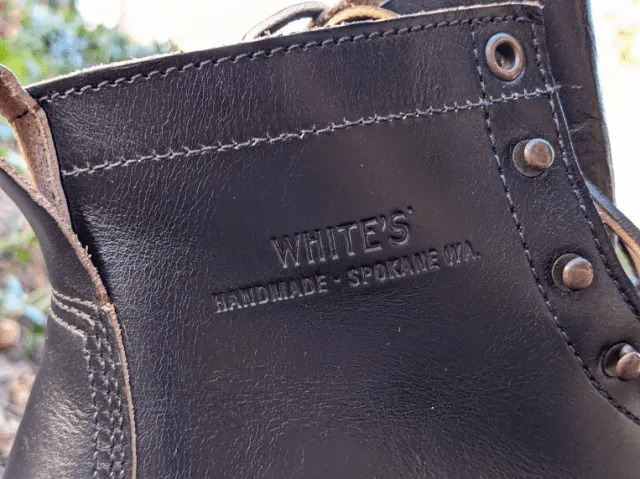
If you don’t like this style, you can ask for “no logo” and they will skip this step.
How to Order a Pacific Northwest Boot: Toe Cap
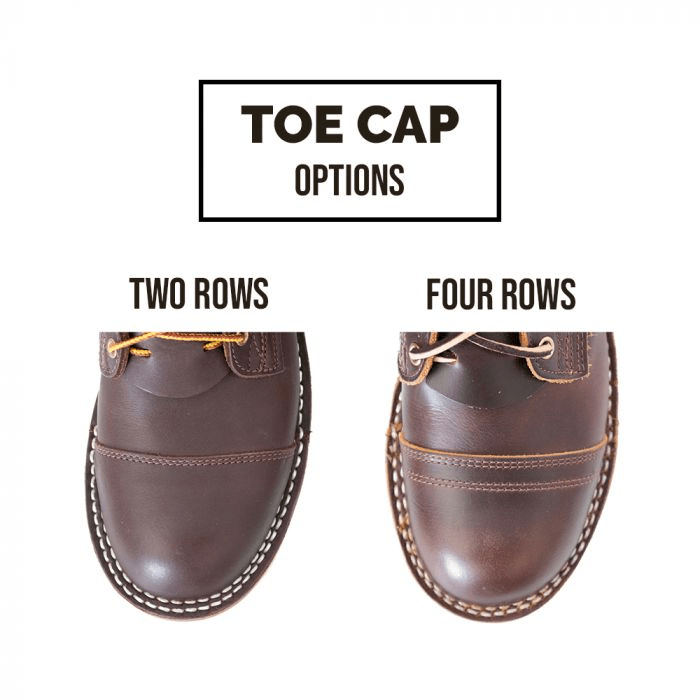
Almost every style of boot can be had either with or without a toe cap. Unlike just about every other boot you’ll find, these toe caps are not stylistic. In other words, where other brands cut the leather at the toe cap and sew a new one on – meaning there is only one layer of leather – these toe caps are a second layer of leather on top of the first.
This second layer provides additional durability. You now need to wear through two pieces of leather to get to the lining. You can also replace this style of toe cap during a rebuild.
Why doesn’t everyone do toe caps this way? Well, other than cost (expect to pay $25-50 more for a double layered toe cap), this adds a lot of visual bulk to an already bulky boot.
How to Order a Pacific Northwest Boot: Toe Structure

Unlike the cap, if you order a Pacific Northwest boot with toe structure, it will add material between the vamp and the liner. Not every brand offers every option, but in general you can opt for the following.
None: This is your basic option. The only thing between the outside worth and your toes is the lining and the upper leather. The toe box will start to collapse over time, and some may find this more comfortable.
Celastic: A thin sheet (or, often, sheets) of plastic that can be formed to the shape of the last. It prevents the toe from collapsing with wear, but doesn’t provide any real protection. This is the most common option for almost all footwear, including Pacific Northwest boots.
Steel or Safety Toe: A shaped piece of steel, typically ASTM and OSHA approved, wrapped over the toes of the boot. Often less comfortable than other styles, this should really only be picked if you need the extra safety.
Other than steel toe, it’s just personal preference.
How to Order a Pacific Northwest Boot: Speed Hooks or all Eyelets

For boots with a lower height, you’re typically offered the choice between a mix of speed hooks and eyelets, or exclusively eyelets. Most bootmakers will encourage you to go for a mix of the two. The speedhooks make getting the boot on and off easier. As you go taller, this gets more important. After 8 inches or so, most won’t even offer eyelets on the website (though, you could get them if you ask).

All eyelets are offered for a few reasons. First, if you really manage to nail the fit and don’t need to loosen the boot much, eyelets on a lower boot can actually be faster. Next, speed hooks can catch. Be it a pair of hemmed pants or something on a job site, if it’s imperative that your boots don’t grab anything, all eyelets are your best bet.
How to Order a Pacific Northwest Boot: Outsole
Second only to lasts in impact on daily use, picking your outsole is a critical choice when designing a Pacific Northwest boot. While the benefits and drawbacks of each specific outsole deserves its own article, generally you’ll find three different categories to pick from.

The first, and previously the most common, are the large lugged options. Almost exclusively variants of the Vibram 100 outsole, this is going to be the standard “work” outsole. It is grippy and looks every bit of it. These will come in softer honey, harder black, and temperature specific versions.
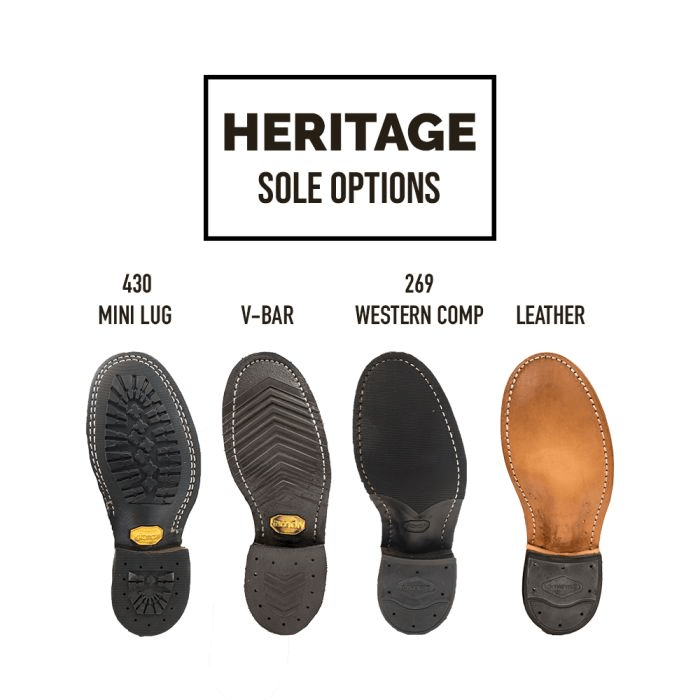
Second, a much larger group, typically known as “heritage” or “dress” outsoles. There are going to be a lot more choices here – everything from Vibram’s 430 mini lug and V bar to Dainite’s studded rubber or even leather. Each of these outsoles gives up something in exchange for a better style.

Finally, each of these brands will offer a wedge sole – a chunk of foam under foot. These are typically the most comfortable and may be required if where you work doesn’t allow heels. It should be noted, since most of these outsoles are single-piece, off the shelf, options, some other choices might be limited.
Picking the right one really depends on how you plan to use the boot. The big, chunky V100 offers great practicality, but will carry rocks and dust through your home. The Heritage soles look great, but don’t have as much practicality. And the wedge soles are the comfort king, but throw off the balance elsewhere and don’t last particularly long.
The good news is that, if you do make a mistake here, you can change outsoles during a resole.
How to Order a Pacific Northwest Boot: Heel Height
Assuming you didn’t get a wedge sole, one more option you’ll pick for the outsole is heel height. You’ll find this given either in broad terms such as “high” or “moderate” or in specific sizes such as “+1/4 inch” or “-1/2 inch.” You may see the term “stack” used instead of “1/4 inch.”
Most lasts have a recommended height for the heel, and in general the boot will be more comfortable if you stick with this height. However, if you’re looking for a specific look or find the standard height uncomfortable, you can change the height.
How to Order a Pacific Northwest Boot: Heel Shape

Heel shape is one of the areas that is most talked about when ordering a Pacific Northwest boot. Though some brands may offer slight variations, at its core there are 4 different styles of heels that are available.

Block: A block heel sits at a 90-degree angle from the back of the boot and the ground. In other words, there are no cuts or curves. It’s visually the most stable, and is typically considered the most comfortable while standing.
The main drawback is that it can get clunky to walk around in – especially at higher heel heights typically found in this style of boot.
Logger / Woodsman: The most common style of heel for a Pacific Northwest boot, a logger heel has a mild to moderate curve inward. Designed to “dig in” in dirt and trees, the curve also makes walking a bit easier as you hit the rubber under your heel rather than behind it.

Dogger: A rarer style of heel outside of Nicks, the dogger is sanded to narrow towards the heel, but only just. Designed to blend the need to get a heel in a stirrup and provide grip when standing, today it’s best for someone who wants the additional walking comfort of the logger without the dramatic curve.

Packer: Originally for wearingly almost exclusively in the saddle, a packer heel features a much more extreme carve in than a dogger heel. In turn, the contact patch on the heel is much smaller. Packer heels can be a bit more difficult to walk and stand in, and have fallen out of favor in recent years.
Ordering
Once you’ve picked out all the options – what’s next? Well, once you place the order you can expect to wait a long, long time. At time of writing, the bigger brands each have a wait list that exceeds 8 months.
For a while the smaller ones could get something out in a few weeks. Now even they will take 2 or 3 months.
If you don’t want to wait, there are ways to skip the line.
The easiest might be to look for a retailer who carries a specific make up. For example, Division Road carries stock White’s.
Alternatively, you may luck out on a pair of returns. Sizing and availability are going to be totally random, but you may luck out. Even better, these are often discounted or come with free shipping. Be aware, though, these may have been tried on, or have other cosmetic issues that caused the return.
Finally, while not immediate, most of the brands have a small number of standard make ups that ship quicker. The reasons for this are varied – easy to keep parts in stock, standard make ups can be done by more workers, etc. – but the long and the short of it is that this is a great way to skip the line.
Of course, for each of these you lose the ability to pick many of the customizations listed above.
Wrap Up
So, there you have it – 4,000 words and 8 pages describing how to order a Pacific Northwest boot.
Anything you feel I missed? Anyone have additional advice? Please feel free to leave it in the comments below to help others land the perfect boot.